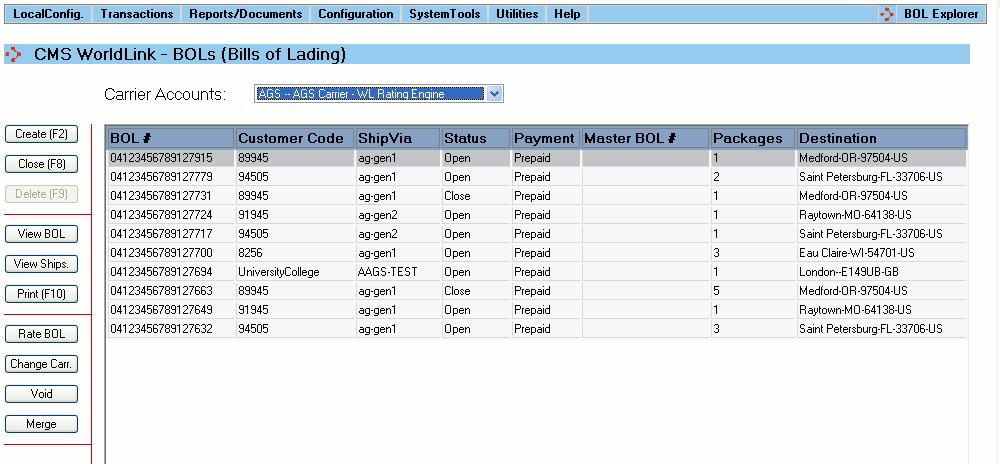
The BOL Explorer screen (Transactions | BOL Explorer) shows all the Bills of Lading that have been created, but not posted.
The following functions are available on this screen:
• Create (F2) – Create a new Bill of Lading.
• Close (F8) – Close the Bill of Lading. No shipments will be able to be added or removed. When a Closed Bill of Lading is selected, this button will become Resume. Select Resume to reopen the Bill of Lading and continue updating.
• Delete (F9) – Deletes the Bill of Lading. A Bill of Lading can only be deleted if there are no shipments attached. If there are shipments, you must void them before deleting the Bill of Lading.
• View BOL – View the data associated with the Bill of Lading.
• View Ships. - View the shipments that are on the selected Bill of Lading.
• Print (F10) – Select to print the Bill of Lading.
• Rate BOL – Select to enter rate information for the selected Bill of Lading. NOTE: You will not be able to rate BOLs for unrated carriers until they have been assigned to a Master Bill of Lading (manifest).
• Change Carrier – Select to change the carrier of the selected Bill of Lading. The carrier cannot be changed for Bills of Lading that are assigned to a master.
• Void - Select to void the Bill of Lading and all associated shipments.
• Merge - Select to merge two Bills of Lading.
Create/View BOL
When you select the Create or View BOL button, the BOL Create/Edit/View Dialog will open.
When you select the Rate BOL button, WorldLink will generate the rates for the selected Bill of Lading. They are displayed as follows:
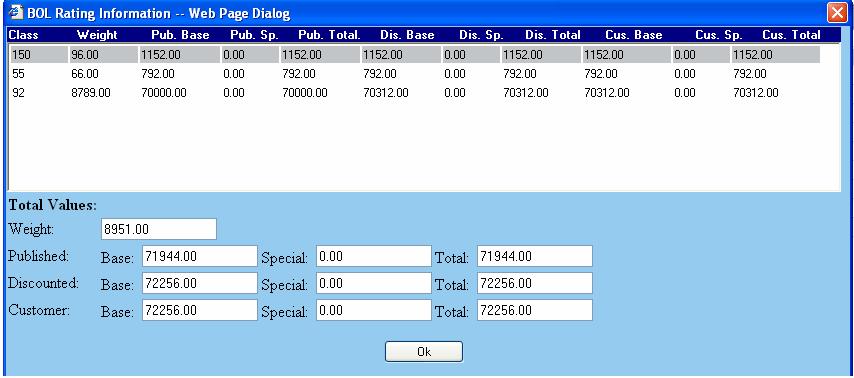
Each class is listed separately with the total weight; the published base, special and total rates; the discounted base, special and total rates; and the custom base, special and total rates. The totals across all classes are listed at the bottom of the screen.
The Change Carrier button allows you to quickly and easily change the carrier associated with a Bill of Lading. When you select this button, the following screen will appear:

The carrier accounts drop down list shows all LTL carriers other than the one currently associated with the selected Bill of Lading. Select the new carrier account and ShipVia associated with that account and enter the PRO number. Select Ok to change the Bill of Lading to the new carrier.
When you select to merge two Bills of Lading, the following screen will appear:
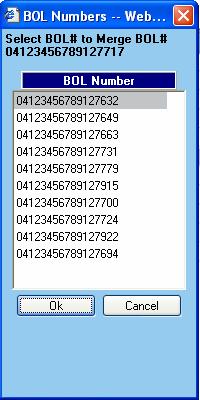
This screen lists all of the open BOLs for the selected carrier. The BOL that is selected in BOL Explorer will be merged with the BOL that you select from this list.